Return to the Ratropolis website. Like us on Facebook.

Tuesday, April 29, 2014

Rats in the News: Rats and Mice React Differently to Men and Women


Article: Male Researchers Stress Out Lab Rodents

An interesting article on the effect that the presence of men has on laboratory rats and mice, compared with the presence of women. I, personally, have never noticed a difference in the way our rats react around my husband compared with around me, but the article does say that the effect diminishes with time, so maybe it is just an effect when they are getting to know you.

I do wonder, however, if this effect plays a role in male vs female veterinarians. Would a rat be less stressed around a female veterinarian? Would he/she be more likely to experience pain around a female veterinarian? I am guessing the effect is insignificant compared with the stress produced just by visiting a strange location with lots of predatory animal smells. My rats have always been nervous visiting the vet, even though our veterinarian is a woman.

I will say that I definitely notice this effect in one of our dogs. She is a very good guard dog, but it takes her a while to warm up to new people. It is much easier to get her to relax around women than around men. I think that is a pretty common reaction in dogs, so I can see it carrying over to rats in less obvious ways.

Friday, April 25, 2014

Carriers for Rats

Bela in our Petmate Look 'N See Kennel, back from the vet

Bela had to see the vet for the first time today. She and her sisters turned one year old sometime this month and with turning that corner comes the inevitable appearance of respiratory infections. This week, I started to hear the faint "rubber lung" breathing sounds coming from Bela that unfortunately mean a respiratory infection is starting to catch up with her. With that, come vet trips and the need for a good rat carrier to transport her in. (Bela is now on Baytril and Doxycycline and we will hopefully nip this in the bud).

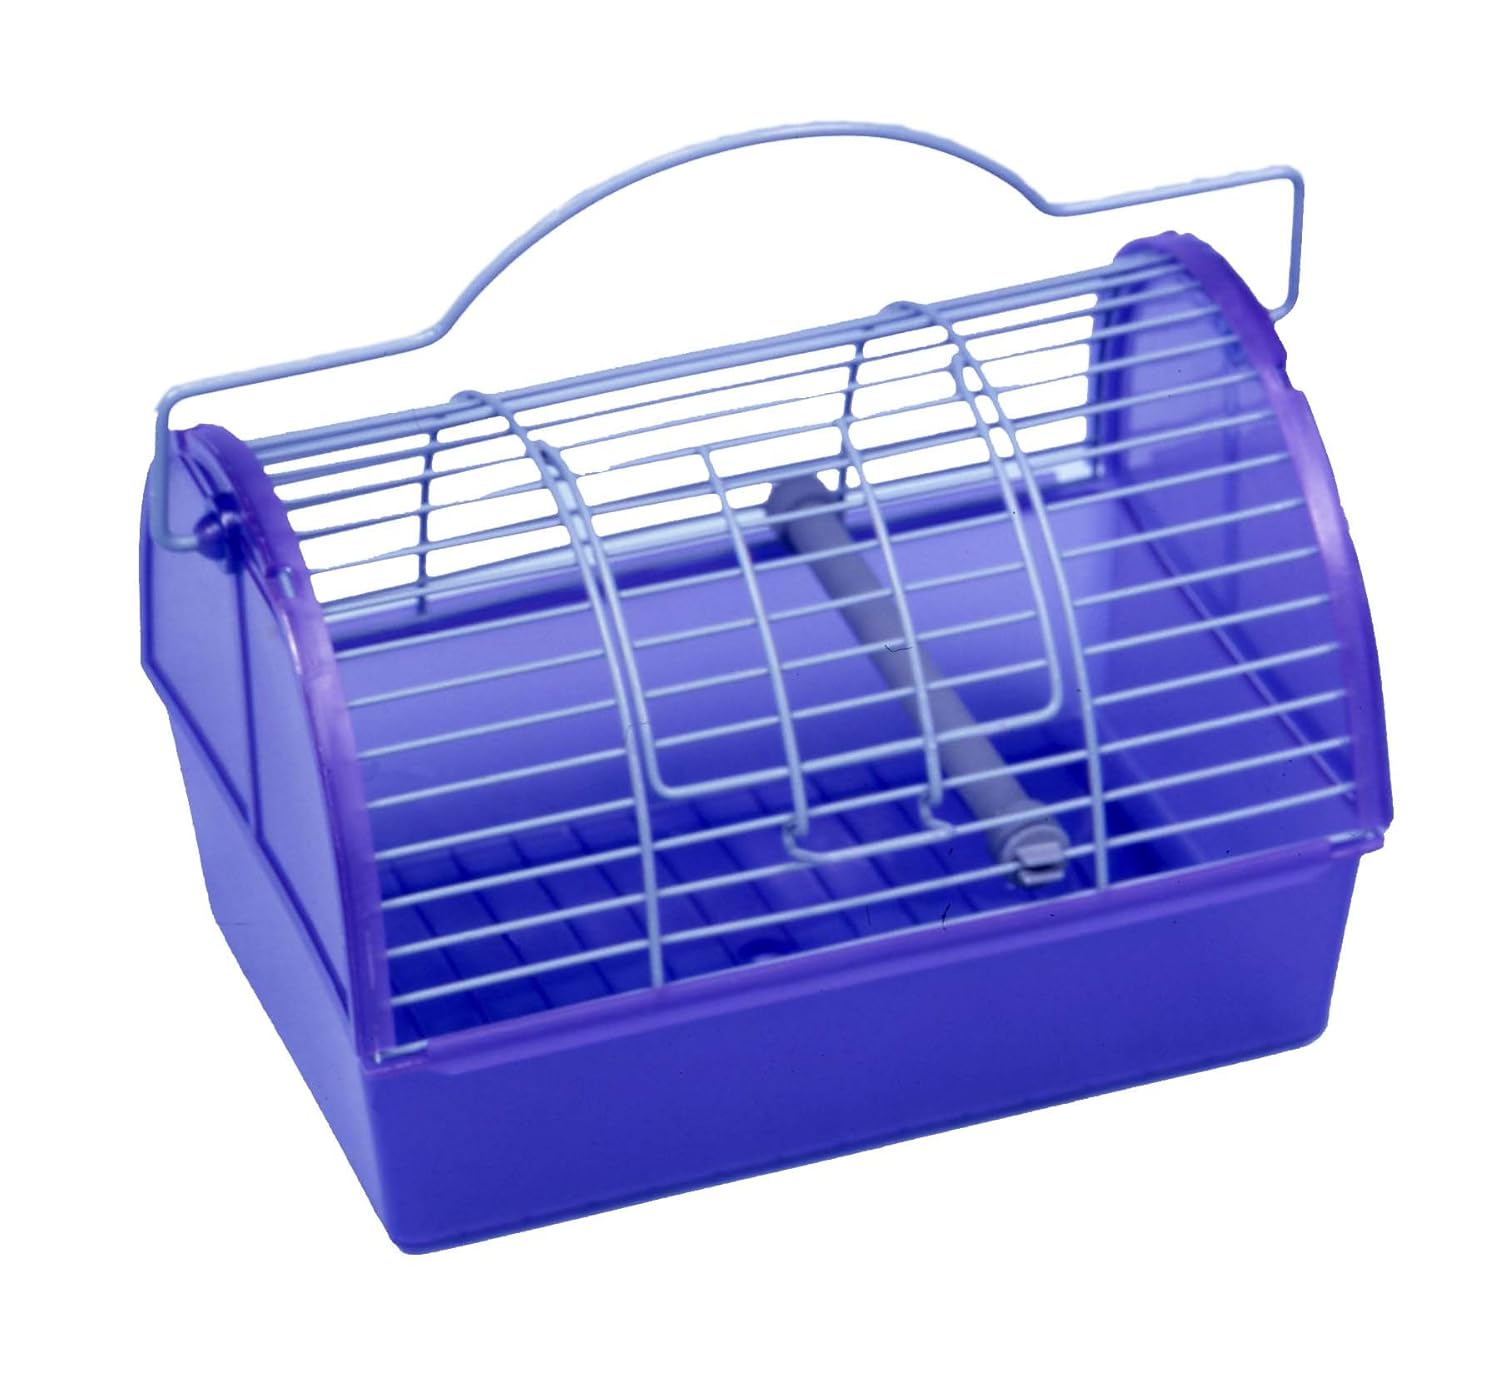
It took us a while to find a good rat carrier. When we got our first rats, I used a small bird carrier I had on hand (similar to the one shown on the left). They are good for babies because the bar spacing is very narrow and the little ratties cannot escape. However, our first boys quickly grew out of that squirmy baby stage and into the big squish stage, and the little bird carriers were way too small.

We looked at small animal carriers, but they all were either too small or made from fabric mesh that a determined rat could quickly chew his or her way out of. For a while, I made my own carrier out of a plastic bin, with the plastic cut out of the lid and a small wire panel from a bird cage zip tied over the opening. But this was only a temporary solution. The ventilation was not great and I don't think the rats felt comfortable inside.

I saw a carrier like the one we currently have (pictured at the top and below) on an episode of iCarly that my kids were watching. They were using it to hold a ferret and it looked perfect. But I couldn't find a small animal carrier like that anywhere. Turned out, I was looking in the wrong place.

In fact, this is a small dog/cat carrier. I found it by accident at Petsmart when they were stacked against the back wall in the clearance section (Petsmart no longer carries this model).  I would never have thought to look for it in the dog/cat section. It is the Petmate Look 'N See Kennel and it is still available from Amazon.

Of course, in retrospect, it makes sense that a cat carrier would make a good rat carrier, as long as the openings are not too big for a rat to squeeze through. I just never thought to look in the cat section. And I like this model especially because of the all metal wire top, which provides the good ventilation that a rat needs and which cannot be chewed. There are also no exposed plastic edges that a rat could chew on. It is the perfect size for rats - large enough for a couple of rats for a short period of time but easy enough to carry around at a vet's office. The smallest babies may still need a smaller carrier until they are big enough not to squeeze through the door openings and if you are taking a long trip you may need a larger transport cage rather than a carrier, but for juvenile and adult rats and quick trips to the vet, this carrier is perfect.

Wednesday, April 16, 2014

Crafty Rat Owners DIY Facebook Group

 
Rats and Do-It-Yourself projects go hand in hand. Many commercial rat toys/accessories are expensive, often unsafe for the animal they are intended for, often sized wrong, and tend not to last long. Ordinary household items/recyclables often work just as well or better with a little craftiness and a creative mind.

There is now a Facebook group for sharing your own DIY projects, whether you just want to share what you've made or share tutorials showing how to make them: Crafty Rat Owners DIY Facebook Group.

This is a great place to find new ideas for adorning your cage and for learning to make things you would have never thought of on your own. It is also a good community for sharing what you have done with other like-minded rat owners. The group includes everything from sewing projects, to crafts, woodworking, cage building - anything that you make yourself for the good of your ratties.

Friday, April 4, 2014

Happy World Rat Day 2014!

Taking a Moment to Remember Past Rats
and Appreciate Present Rats
on World Rat Day 2014
 
 
Gabriel (Gabe), Mystery, and Weasel
Gabe Loved Us from the Minute We Brought Him Home
 
Mystery (left) and Gabe (right)
Gabe
Mystery
 
Mystery and Weasel Want More Cheerios
 
Weasel Loves His Pumpkin
Weasel Was the World's Best Shoulder Rat
 
Pirate and Loki
 
Loki
Loki
 
Forget the Pretzel Piece, Loki Wants the Whole Bag
Pirate
 
Pirate and Bela - He Loved His Girls!
 
Bela, Ruby, and Jo
 
Bela and Ruby are Best Buds!
 
Ruby is the Shy One
Jo is Definitely Not Shy!

Jo and Ruby
Jo Would Like Some Cereal Too

 Bert

Bert is the Boss!
 
I'm Pretty Sure I Smell Food!


Monday, March 31, 2014

Rats and Rat Fleas Exonerated - Not to Blame for Spreading Black Death


Good news for rat lovers everywhere. Scientists no longer believe the Black Death was spread by rat fleas. First, it was the rats who got the blame for spreading the disease that killed 6 of 10 people in the city of London in the mid-1300's. Then the rats were cleared and their parasitic pest, the rat flea, was blamed instead. Finally, we know that rats are not the dirty, disease-spreading creature that they are often portrayed as because of this historic connection to the plague. Instead, the dirty, disease-spreading creature turns out to be . . . . other humans.

In the article Black Death was not Spread by Rat Fleas, Say Researchers, scientists examined skeletons recovered in the Clerkenwell area of London and have determined that the plague could not have been spread by rat fleas and instead had to have been airborne in order to spread the way it did. They compared the DNA of the plague organism to the DNA of a plague organism that recently killed 60 people in Madagascar. They found it was no more virulent than the modern version. Yet the modern version did not spread the way the older organism did. They concluded this is because modern antibiotics prevent the disease from becoming pneumonic (airborne). Thus, the quick spread of the plague back in the 14th century had to be attributed to it being spread via the air, not via rat fleas. This would mean that the plague was not actually a bubonic plague, but instead a pneumonic plague.

This article just reinforces what we rat owners already know. Rats are not the huge disease threat that people make them out to be. Instead, humans are the biggest disease threat.

Monday, March 24, 2014

Using Rigilene in Your Hammocks

Hammocks Reinforced with Rigilene

Have you ever wanted to make a cube that can stand upright on its own without needing to be hung from the cage bars? Rigilene may be the solution.

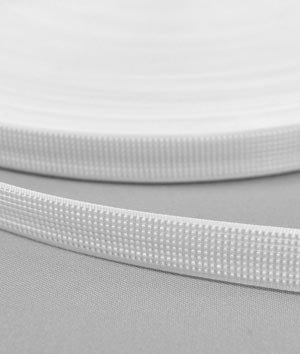
Rigilene polyester boning
What is Rigilene? It is a flexible polyester boning used in strapless dresses and swimwear to provide that extra support that keeps everything "up." It is not as firm as some forms of boning, but it can be sewn directly onto fabric and it is machine washable.

I have found that sewing strips of Rigilene into or alongside of the seams in a cube can help it keep that upright shape without sagging or collapsing.

The nice thing about the Rigilene is that it seems to have that perfect balance of support and flexibility. If it is too stiff, it would be hard to work with and difficult to turn the cube right side out when completed. It also would not collapse for easier storage. If it is too flexible, it won't hold the desired shape and will collapse. In my testing of the self-supporting cube, I have found that when placed in the rat's play pen, it maintained its shape as the rats explored it and wrestled inside it. It will support the weight of a rat on top of the cube, but it likely would not allow the rats to climb on top without giving way. However, the rats seemed to sense this and while they put their front feet up against the top, when they felt the boning start to bend a little, they promptly got down and did not attempt to jump on top. So, during out time, the cube held up great without additional support. At the end of the week, when I change out the hammocks, I will leave the cube in the cage to see how it holds up without support.

The cube can be collapsed and stored by pushing in on one corner until it collapses inward, then folding the structure into a square.

The Rigilene comes on a roll and thus has a natural bend to it. You can iron your cut strips to straighten them out. After washing, a little of the curl did return, but it wasn't too bad. Just a slight bowing in some of the sides.

I test washed the cube and it did lose a little of its perfect shape, but still held up structurally (the picture above was taken after it had been washed). I had read that with Rigilene, you need to burn the cut edges of the boning or wrap the ends in scraps of densely woven cotton, or the sharp edges of the boning will prick the garment wearer. Since I was not making a garment, I did not bother to do this, but I should have. After washing, some of the sharper corners started to poke through the fabric. It didn't help that I was using cheap Easter fabric. So, with subsequent projects, I have been burning the tips of the Rigilene with a candle lighter so that they melt slightly and the edges have a smooth finish. I advise you not do this in the same room with the rats as it does briefly emit a chemical burning smell. Or you can just fold a small piece of tough fabric around the edged before sewing.

Once I had the cube figured out, I wanted to see if I could use this material in some of the other hammocks that would benefit from a little support. The most obvious was the tube - using Rigilene to hold the tube open in a circle at either end. Ironically, it was more difficult to use in the tube than I expected. The difficulty comes with using Rigilene in a perfect circle and still being able to sew it into the tube. My first attempt did not work the way I expected, and I ended up just having to sew the circles into the ends by folding the raw edges into the tube and leaving them exposed. I would like to find a more finished way to do this and will continue experimenting. If I just want the tube held open in a tear-drop shape - that is much easier to do. But in my mind, a tube should be circular.

After my experience with the tube, I realized it would be extremely easy to create a tunnel that sits on the ground, with the rigilene keeping the tunnel upright in a half circle shape. The tunnel was the simplest of the projects I tried and came out just as imagined. I used three strips of Rigilene (front, back, and center) to keep the tunnel open, with about six inches between each strip. Down below you can see that Jo really enjoys the tunnel.


Jo Peeks out from the Tunnel
The last project I tackled was an Easter basket. The basket is basically a modified cuddle cup with a Rigilene structure supporting it, a Rigilene handle wrapped in fabric, and no dipped opening. This was by far the hardest of the projects to implement and I swore that I would not attempt it again. The stitching was absolutely atrocious, because it was hard to guide the structure through the sewing maching. However, the final product, despite all the poor craftsmanship was still very nice. I have an alternate idea for constructing it that I will be trying out. I am not sure if that method will end up being harder or easier, but I like the finished product enough, that I am willing to give it a try.
 
I do not have tutorials for any of these projects yet because I am still working out the kinks. I will add tutorials for the projects that I am able to master when I have things figured out to my satisfaction.